Connect 2.0
Overview
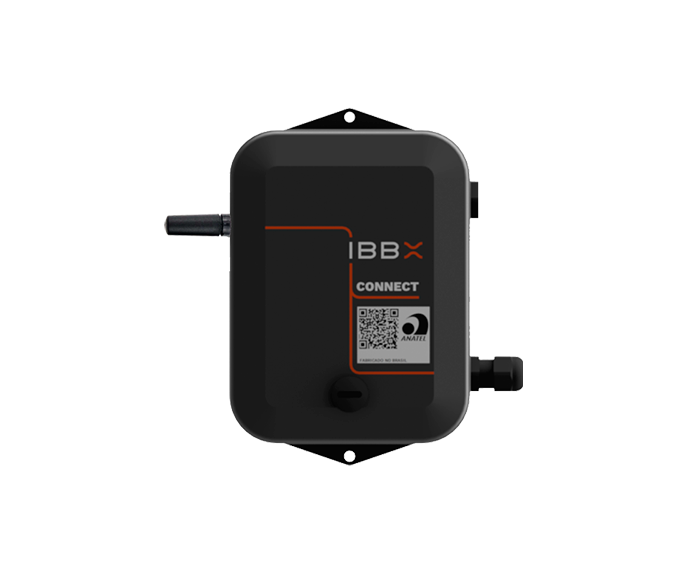
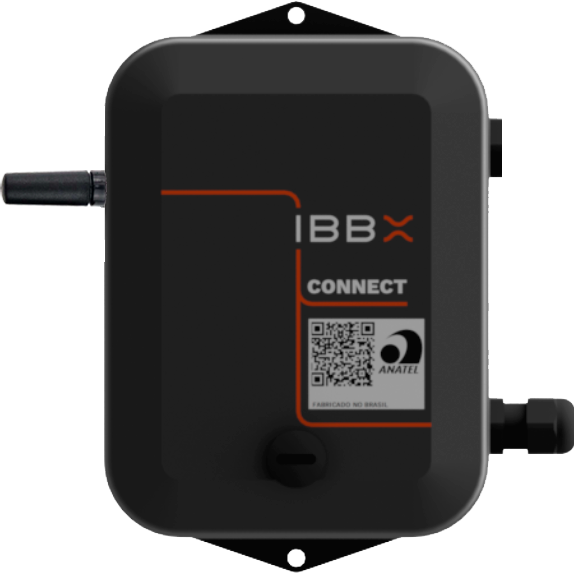
Connect 2.0 is an innovative IoT Programmable Logic Controller (PLC), notable for its ability to operate completely wirelessly, both for data transmission and power supply. Its main feature is its versatility and flexibility, allowing it to adapt to different types of sensors and actuators, supporting practically all digital and analog protocols.
Designed for a variety of applications, Connect 2.0 is capable of monitoring data from a sugar cane harvester to the complete automation of a water treatment system. It also has the capacity to connect multiple endpoint sensors simultaneously, such as temperature, humidity, pressure, pH and level sensors, ideal for water treatment plants.
A crucial advantage of this product is its ability to operate over long distances and in environments with barriers and interference. This makes Connect 2.0 an excellent choice for applications where conventional monitoring, control and automation systems are unfeasible due to the high cost and complexity of installation and maintenance.
Read more| Model | Model 01 |
| Working Temperature Range | -20ºC to +70ºC |
| IP | IP65 |
| Battery | 3.7 V (3000 mAh) |
| Other types of food | Energy Harvesting: via ambient electromagnetic noise max 2mAh/3.7V Solar Panel: Input: 5.5 to 7 Volts, 100mA USB-C: Input 5.0 Volts 500mA |
| RS-485 | Bidirectional: MODBUS RTU 2400, 4800, 9600, 19200, 115200 bps |
| USB | Bidirectional: PC COM: 2400, 4800, 9600, 19200, 115200 bps |
| Analog | Input: 0 to 10 Volts - 4 to 20 mA |
| GPIO | Bidirectional: 0 to 3.3 Volts (LTTL) |
| Command | Output: 3v3 switched |
| Power Out | Output: 3 - 4.2 Volts, 300mA |
Video highlights
No video found.
See step by step
ATTENTION
Never turn on Connect 2.0 without first connecting the antenna.
Never change the Connect 2.0 antenna when it is switched on or energized.
1. Connect the RF antenna to Connect 2.0 and make sure it is screwed on tightly.
2. Establish the connection with the device of interest (sensors, actuators, controllers, etc.). Always have the manual for Connect 2.0 and the device to be integrated at hand to ensure proper installation.
1. Access the Retina platform.
2. Log in with your credentials.
3. Navigate to the Unit/Area/Sector where the device will be installed.
4. Locate the asset you want to monitor.
5. Click on "Add Device".
6. Select Connect 2.0 from the list of available devices.
7. Scan the QR Code or enter the UUID of the Connect 2.0.
8. Choose the desired port type and configure it according to the instructions in the connected device's manual.
1. Press the ON/OFF button to turn on Connect 2.0. At this point the device will light up green (Waiting for connection and battery ok) or red (Waiting for connection and battery low).
2. Synchronize the device with the IBBX connectivity network of the selected unit. (The blue light will come on for 5 seconds when the device is connected to the network)
1. Manage power connectivity and device connectivity via the connectivity area on the Retina platform.
2. Check that the graphics and functionalities are working as expected. If there are any discrepancies, review the previous steps or contact technical support.
What they're saying about us